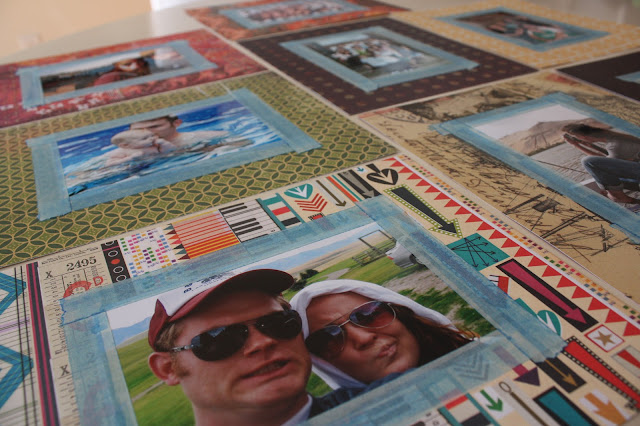
I love love love paper... there is just so much you can do with it and the patterns really are so fantastic. The funny thing is I don't scrapbook... but I have a huge pile of scrapbook paper. So recently I discovered a way to frame some
of my very favorite pictures using scrapbook paper, masking tape, and a
marker!

I thought I would share the idea!
Materials:
Paper cutter
Ruler
Masking tape
Scrapbook paper
Maker (I used Chartpak)
An amazing photo!
To begin I cut the 12x12 piece of paper down to 8x10. You can use whatever size you want, 8x10 is a great size though for a 4x6 piece of paper and to find a frame for if you wanted to.
Mark where the picture needs to go. The photos I was using were 4x6 so an 8x10 piece of paper gave me two inches around each side of the picture.
I used a small piece of masking tape to hold the picture in place before the masking tape was put down all around the picture.
Once the picture is in place, tape it down on all four sides using the masking tape. Don't worry about the tape overlapping, or going too far beyond the edge of the picture. That all gives it character in my book!
After the tape was down, I used a marker to "stain" the tape any color you would like! I used a Chartpak marker because of the bleeding qualities. I wanted it to look as much like stain as possible.
TA-DA! That's it! What do you think?? It was really simple, fast, and easy I went to town! I framed eight pictures in one sitting... it definitely added some much needed color and pattern to my house!
Now I'm trying to decide though how to hang them. Framed or not framed? I would love to see them all lined up in a grid in the same simple black frame. Or I could hang them from some string with clothes pins... hm... what to do what to do? Maybe I'll hang them on string with clothes pins until I get the frames!


So fun!
ReplyDeleteDawnelle, I love this idea and these look so great!
ReplyDelete